How to Bake Real Sourdough Bread Without a Stand Mixer: A Complete Beginner Guide
No mixer, no problem sourdough builds its structure through time and a few folds, not muscle. Here is the full beginner method, from a ripe starter to a crackling crust.
You do not need a stand mixer to bake real sourdough bread without a stand mixer — you need time and a few well-timed folds. Sourdough is the one bread where a mixer is genuinely optional, because the dough develops its structure during long fermentation rather than aggressive kneading. Gluten strands organize themselves as the dough rests, and a handful of gentle stretch-and-folds over a few hours does what ten minutes of machine kneading would, with less heat, less cleanup, and a better feel for what good dough is supposed to do.
This guide walks the full arc: a healthy starter, mixing by hand, the folding schedule that builds strength, the long bulk ferment, shaping, an overnight cold proof, and the Dutch-oven bake that gives you a crackling crust. It assumes you've never done this and explains why each step works, so when something goes sideways you can diagnose it instead of guessing.
What do you need before you start?
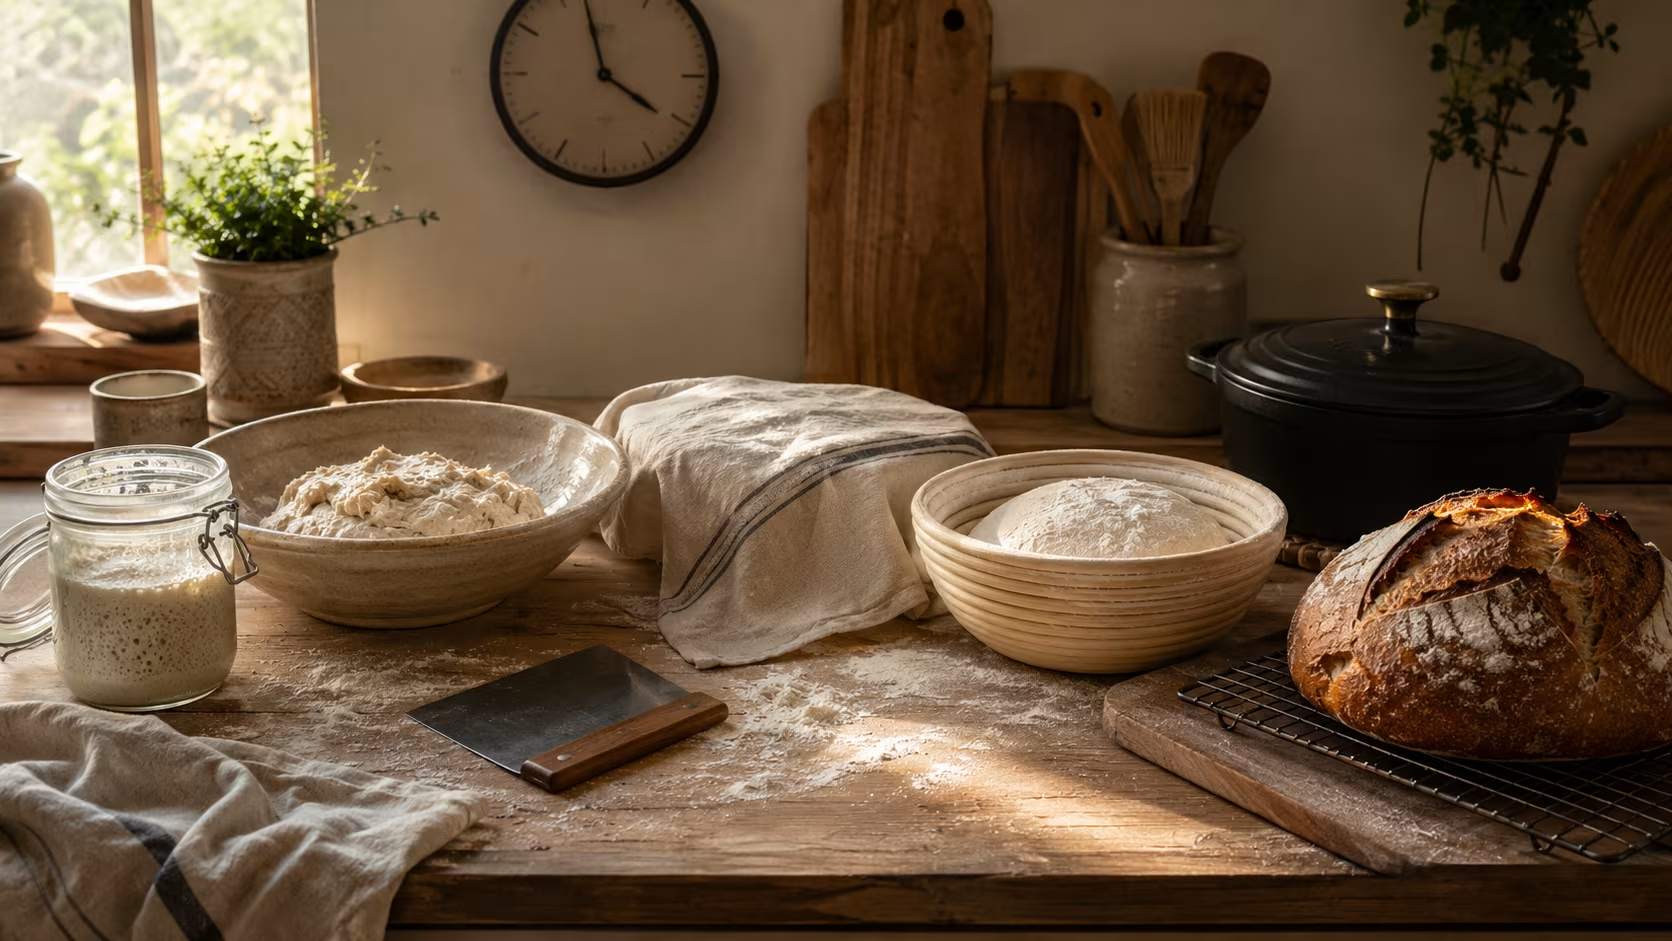
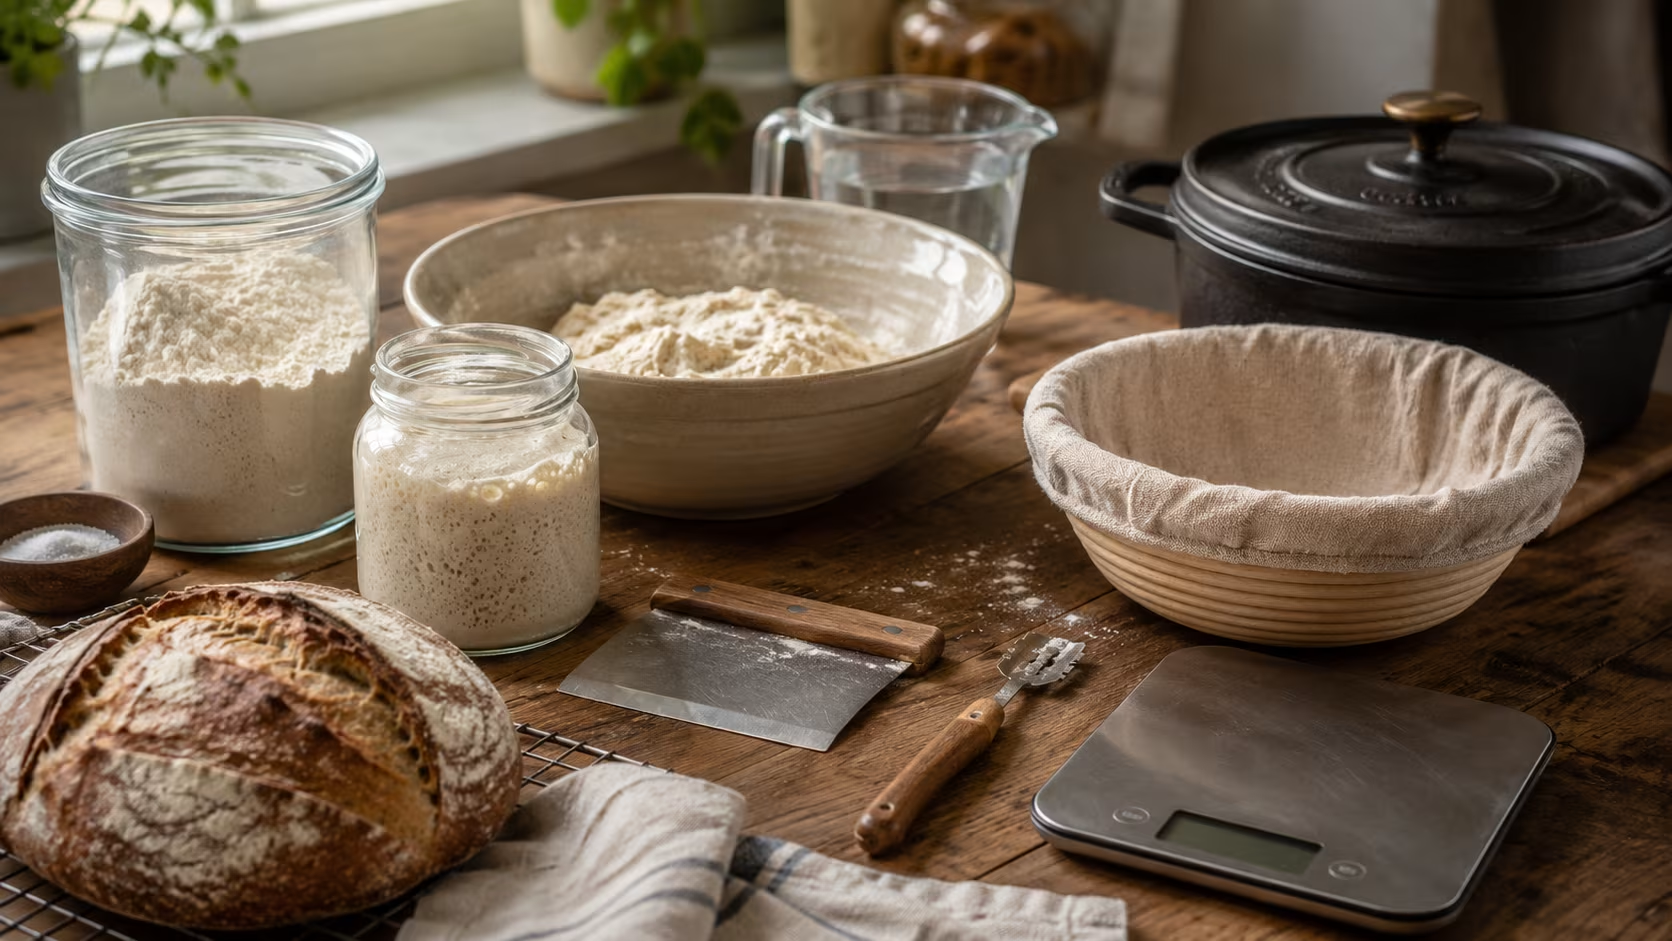
The equipment list is short and deliberately mixer-free. A large mixing bowl or a 6-quart food-safe container, a bowl scraper or sturdy spoon, a kitchen scale, a banneton or a bowl lined with a floured tea towel for proofing, and a Dutch oven with a tight lid. The Dutch oven is the one item worth owning — it traps the bread's own steam during baking, which is what produces a thin, glassy, crackling crust at home without a steam-injected professional oven.
A scale matters more than any gadget. Bread is a ratio, and ratios are measured by weight, not volume.
A cup of flour can vary by 20% depending on how you scoop it, which is enough to swing your dough from slack to stiff. Weighing in grams removes that variable entirely and is the single biggest upgrade a beginner can make.
You also need an active sourdough starter — a living culture of wild yeast and bacteria. If you don't have one, you can grow one from flour and water over a week or so, or beg a few tablespoons from anyone who bakes. The starter is "ripe" and ready to bake with when it has roughly doubled after a feeding and floats in water; King Arthur Baking has a reliable starter walkthrough if you're starting from scratch.
How do you mix the dough without a mixer?
Mixing by hand is genuinely just stirring. In your large bowl, combine the ripe starter, water, and flour and stir with a spoon or dough whisk until there's no dry flour left and you have a shaggy, sticky, rough mass.
It will look like a mess. That's correct.
Cover it and let it rest for 30 to 60 minutes before adding salt — this pause is the autolyse, and it does real work.
During autolyse, the flour fully hydrates and enzymes begin breaking starches into sugars while gluten proteins start linking up on their own, with zero effort from you. A dough that's rested this way becomes noticeably more extensible and easier to handle, which means you need far less mechanical work later. It's the laziest high-leverage step in baking.
After the rest, add the salt with a small splash of water and squeeze it through the dough with wet hands until evenly distributed. The dough will feel rough and tear easily at this stage. You're not trying to make it smooth yet — that happens over the next few hours through folding, not through brute kneading now.
What are stretch-and-folds and why do they replace kneading?
Kneading and folding accomplish the same goal — aligning and strengthening gluten strands into an elastic network that traps gas — but folding does it gently, over time, instead of all at once. For a no-mixer loaf, folding is the whole game.
A stretch-and-fold is simple: with a wet hand, grab one side of the dough, stretch it up and over to the opposite side, rotate the bowl a quarter turn, and repeat until you've gone all the way around — four folds, maybe fifteen seconds of work. Then cover and walk away. You repeat this set every 30 to 45 minutes for the first two to three hours of the bulk ferment, typically three or four sets total.
The mechanism is worth understanding. Each fold stretches the gluten strands and layers them, and the rest between folds lets them relax and bond into longer, stronger chains.
Do it too aggressively and you tear the network; space the folds out and the dough quietly transforms from a slack, sticky blob into a smooth, cohesive mass that holds its shape and jiggles like a set custard. You'll feel it tighten with each set.
That tactile feedback — impossible to get from a machine doing the work behind a bowl wall — is one of the quiet reasons hand-built sourdough makes better bakers.
How long should the dough ferment?
Bulk fermentation — the first long rise — is where flavor and structure both develop, and it's governed by temperature, not the clock. At a typical room temperature around 70°F, bulk usually runs four to six hours.
In a warm summer kitchen it might finish in three; in a cold one it can stretch past eight. Watch the dough, not the timer.
You're looking for the dough to rise by roughly 50 to 75% in volume, dome slightly on top, show a few bubbles at the surface and edges, and feel airy and alive when you nudge the bowl. Underproofed dough is dense and gummy inside; overproofed dough goes slack, loses its structure, and bakes into a flat, sour loaf. The window between them is the skill you're building, and it comes faster than you'd think once you've watched a few batches.
The reason fermentation can't be rushed is biological. Wild yeast produces the carbon dioxide that inflates the loaf, while lactic and acetic acid bacteria produce the tang — and both work on their own slow schedule.
A long, cool ferment yields more complex, sour flavor; a fast, warm one is milder. This patient fermentation is also why long-fermented breads like a 72-hour cold-ferment pizza dough taste so much deeper than same-day versions.
How do you shape and proof the loaf?
Once bulk is done, turn the dough onto a lightly floured counter for pre-shaping. Using a bench scraper, gently fold the edges toward the center and flip it seam-side down, then drag it in small circles against the counter to build surface tension into a loose round.
Let it rest, uncovered, for 20 to 30 minutes. This bench rest relaxes the gluten so the final shaping doesn't fight you.
For the final shape, flip the round over, fold it like a letter, and roll it up into a taut ball or torpedo, then place it seam-side up in a floured banneton or towel-lined bowl. Surface tension is what gives the baked loaf its height and that dramatic "ear" when scored; a slack, poorly shaped dough spreads into a frisbee no matter how good the fermentation was.
Now proof it cold. Cover the banneton and refrigerate it for 12 to 18 hours overnight.
This cold retard does two things: it slows fermentation to a crawl so the timing becomes forgiving (bake whenever you wake up), and it lets the acetic-acid bacteria work, deepening the sour flavor. Cold dough is also firmer and far easier to score cleanly than room-temperature dough.
The overnight fridge stage is the secret that makes a beginner loaf look and taste like a bakery's.
How do you bake it for a crackling crust?
Put the empty Dutch oven, lid on, into the oven and preheat to 475°F (245°C) for a full 45 minutes. A screaming-hot vessel is non-negotiable — the burst of heat against cold dough drives the "oven spring," the dramatic final rise in the first ten minutes before the crust sets.
Take the cold dough straight from the fridge, turn it out onto a piece of parchment, and score the top with a sharp blade or razor, one confident half-inch-deep slash. Scoring controls where the loaf expands; skip it and the bread tears unpredictably along its weakest seam. Lower the dough, parchment and all, into the hot pot, cover, and bake covered for 20 minutes.
The covered phase is the crust mechanism. Trapped inside the lidded pot, the bread's own evaporating moisture creates a steamy environment that keeps the crust soft and elastic long enough for full oven spring, then gelatinizes the surface starches for that glassy sheen.
Remove the lid after 20 minutes and bake another 20 to 25 minutes uncovered to brown and crisp. The loaf is done at an internal temperature of 205–210°F, or when it sounds hollow tapped on the bottom.
Then comes the hardest step: wait. Let the loaf cool completely, at least one to two hours, before cutting. The interior is still finishing — starches are setting and moisture is redistributing — and slicing a hot loaf gives you a gummy, collapsed crumb.
Why is my loaf dense, flat, or gummy?
Almost every first-loaf disappointment traces back to one of three causes, and each leaves a recognizable signature. Learning to read the loaf tells you what to change next time.
A dense, tight crumb with little rise almost always means the dough was underproofed or the starter wasn't active enough. The wild yeast simply didn't produce enough gas, either because the starter was sluggish (feed it twice before baking and use it at its peak, when it's doubled and bubbly) or because the bulk ferment was cut short. The fix is patience and a livelier starter, not more flour.
A flat loaf that spreads sideways points the other way — overproofing or weak shaping. Overproofed dough has exhausted its gas-trapping structure and slumps; under-shaped dough lacks the surface tension to hold a tall round. Watch for the 50–75% rise in bulk rather than letting it double or more, and build real tension during the final shape so the loaf has the strength to rise up instead of out.
A gummy, dense interior usually means the bread was underbaked or sliced too soon. Bake to an internal temperature of 205–210°F, and resist cutting until the loaf has fully cooled — the crumb finishes setting as it cools, and slicing early traps steam that turns the interior pasty. A pale crust is a related tell: not enough time or heat, so the surface starches never fully developed.
The encouraging part is that none of these failures wastes the loaf — underproofed or flat sourdough still makes excellent toast and croutons — and each one teaches you exactly what to adjust. Keep brief notes on what you saw and changed, and you'll dial in your kitchen's timing within a handful of bakes.
Once you've mastered this rhythm, the same patience and lamination logic carry straight into richer doughs like homemade croissants and beginner brioche. Bake one loaf, watch the dough instead of the clock, and you'll never reach for a mixer again.
Common sourdough questions
My starter isn't doubling — can I still bake? Not well. A sluggish starter won't leaven the loaf and you'll get a dense brick. Feed it twice a day for a few days in a warm spot until it reliably doubles within four to six hours, then bake.
Can I use all-purpose flour instead of bread flour? Yes, though bread flour's higher protein builds more structure and a chewier crumb. All-purpose makes a softer loaf, and you may need slightly less water since it absorbs less.
Why is my crust pale and soft? Usually too little heat or too short a bake. Preheat the Dutch oven hard, and finish the loaf uncovered until the crust is deep brown — a pale crust almost always means underbaked.
Do I have to use a Dutch oven? It's the easiest way to trap steam for a crackling crust at home. Without one, bake on a stone with a tray of water in the oven for steam, but expect a slightly thinner crust.
 Save
Save


0 Comments
No comments yet — start the conversation below.